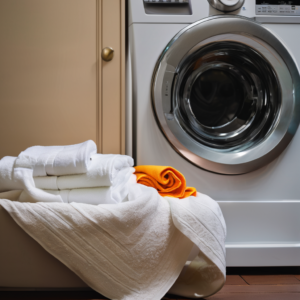


Shirt laundry near me: How to sew a button
Tools you’ll need:
Needle 2 if you can - Any basic sewing needle will work, but the thinner the better.
To complete the entire process, you will need 12 inches of thread. Double your threads to make it stronger and easier

to tie. Use 24”. Use a thread that is the same color as your garment. However, in a pinch, you can use black or navy.
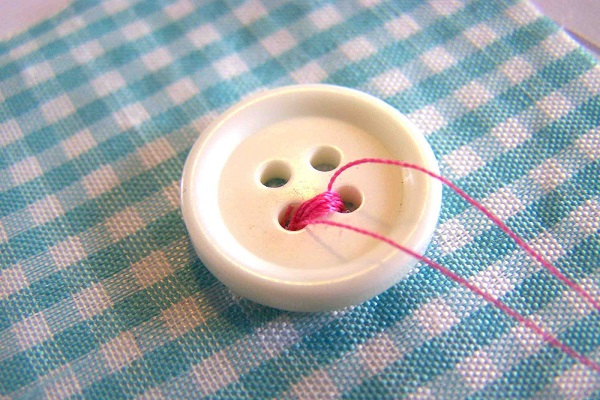
Button – Use the original button if you can, or use whatever you have. Most shirts have an extra set of buttons sewn to the inside of their bottom front. Some buttons have two holes while others have four. This is a four-hole button. However, it can also be used to create two-hole buttons.
Cutting tool - A pair of scissors, a knife or anything else that can be used to remove excess thread. In a pinch, you can use your teeth.
Ask the front desk of your hotel for a sewing kit if you are traveling without the above supplies. They will often have one for you. As you never know when or where your button will pop off, I advise that you always keep your own emergency sewing kit in your bag.
How to sew a button
If possible, take off the garment. However, in the story I told above, I performed the procedure in front a mirror in a public bathroom. Find a restroom stall if you need to work on your front trouser button.
Button and white thread on a brown fabric.
Step 1: Thread the Needle and Knot the End
What amount of thread do you have? If you have 24 inches, you can “double over” which is sliding the thread through an eye of the needle. Then you will double it until you have equal amount on each side. At least 12 inches is required. You can either have the ends of a doubled-over thread knotted in a simple square knot or use the same method for a single end.
Use white thread to thread the needle
You will need to use one thread if you have less than 24 inches. To tie it off, slip a little slack through. You should leave about an inch of slack. However, you can use as much or as little as you like. Then you will pull it back in the next step.
You have two options: tie the thread’s back with a few overhand knots or wrap it around your forefinger multiple times. The loops can be rolled into a tight bundle using your thumb. Once the bundle is rolled, you can slip it off your finger. Grab the loops in one hand, and pull the long end of the thread with the other. The loose bundle should be pulled into a tight knot.
In both cases, the knot will be tied to the first anchor to prevent the thread from slipping.
Step 2: Create an Anchor “X” Point
Close-up view of anchor point x on a brown fabric
Start at the back of the fabric and work your way to the front, where you will need the button. The thread should be run through the back and back again.
The button’s center will be marked with a small “X”. This is the reinforced anchor that holds the thread together during stress.
Step 3: Position the button
Attached to the button with white thread is a needle.
Place the button on the anchor “X”, and start sewing. Push the needle from the front to the back through the first hole. You will need to place the spacer. A second needle, pin, toothpick or small stick can all be used at this stage.
Push the needle upwards from the garment’s underside and through the hole in the button. Pull the thread through the buttonhole until it is snug against the fabric’s underside. To keep the button in place, use a fingertip.
A button is attached to cloth using thread and needle.
Turn the needle upside down and push it through the hole opposite to the one that you just came up from. Pull the thread tight and push it through. The button should now have a small thread running across it, connecting the two holes.
This will be repeated six times, three per set of buttons.
The needle passed the thread through the holes of the button.
Step 4: Make the Shank
After you have completed the previous step, go back through the fabric. As if you were going through the normal hole in the button’s button, come up again. However, turn the needle over and pull it out from under the button.
Making a shank by sewing a button.
Wrap your thread around the buttons using the needle. Six loops should be made around the thread bridges that connect the button and the fabric.
Pull tightly and then plunge the needle into the base. Tie the ends of the fabric together.
While sewing button was being sewn, needle was passed through the cloth.
Step 5: Tie it Off
You can tie a small knot in the back of the fabric. The needle can be used to guide the thread through the knot. Or you can cut the thread with your fingers and tie it in the slack. Either way, you want the thread snug against the fabric’s back.
Attach the button from the back.
A simple overhand loop, tied with the needle still attached, is probably the easiest knot to tie. The thread should be pinned to the fabric right under the button.
Next, make a small circle in the thread at your fingertip. Pass the needle through this circle. Then tighten the thread and trim any excess fabric.
Needle was passed through the cloth and button.
These instructions can be used on suit buttons, shirt buttons, and trouser buttons. Busy mum or busy professional, our wash & iron service will leave you with the thought, “Why didn’t I use the shirt laundry near me earlier?”